Photo Archive - Butterley to Ironville 2
This photo gallery shows a number of the images within the FCC archives picturing the canal between Butterley Tunnel and Ironville. More images can be seen on the previous page. Please note that the galleries are due to be updated in the near future to use a better viewing system.
Click on any of the images to see a larger version.
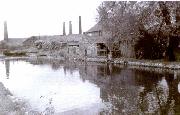
In the early part of the 20th century, the buldings of Codnor Park Forge dominated the Ironville flight. They have now all been swept away and the site opencasted
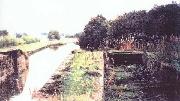
Marshall's Lock had a dry dock to one side of it, which was interestingly enough built only to take 7' beam boats
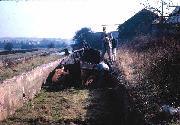
An LMS ice boat lay abandoned in Marshalls Lock in the 1960's, as this Ian Moss photo shows
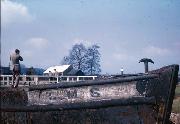
The boat still carried evidence of its former owners, many years after the LMS ceased to exist. (photo Ian Moss)
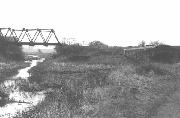
By 1964 the Forge buildings had gone and the bridge presided over the derelict entrance to the Portland Arm. Note that one of the top members appears to have been cut through.
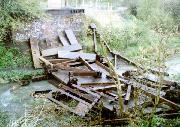
The bridge was cut up on site. This picture is of particular interest as it shows the simple construction of this Butterley-built bridge, the "kit of parts"-style design being used extensively in post WWII Europe to replace war-damaged bridges. It wouldn't be too difficult to recreate

The Lock Keeper's cottage and associated workshop have become derelict since this photo was taken
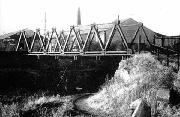
The Iron Bridge provided a link into the Codnor Park Forge
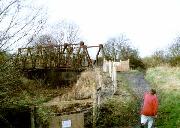
Eventually, somebody decided that the bridge was unsafe, and fenced it off

This view of Jacksdale Wharf was taken in about 1904. It shows the old tram line which was horse and cart operated until the 1870's and then steam up until 1894 when it was abandoned. The lack of vegatation growing on the line shows that the photo was taken very early in the century. Also, maps show that rail lines ran right alongside the basin (between the tramline and basin), whereas the tramline went directly into the forge, crossing the canal and river Erewash at the point where the Iron Bridge was built. It also shows the old Great Northern Railway viaduct across the valley (with the station on top) - all long since swept away


)


, whereas the tramline went directly into the forge, crossing the canal and river Erewash at the point where the Iron Bridge was built. It also shows the old Great Northern Railway viaduct across the valley (with the station on top) - all long since swept away)