Photo Archive - Bullbridge to Butterley
This photo gallery shows a number of the images within the FCC archives picturing the canal between Bullbridge and Butterley Tunnel. More images can be seen on the next page. Please note that the galleries are due to be updated in the near future to use a better viewing system.
Click on any of the images to see a larger version.
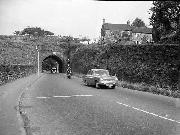
The narrow arch wasn't really suitable for modern traffic
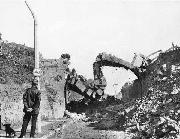
Demolition is completed as the arch finally falls
"Mind the Gap!" (photographed in the 1970's by Len Waller)
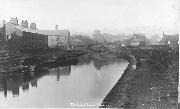
Hartshay Wharf in about 1900. The wharf took originally took coal via horse-drawn plateways from an old colliery close to Pentrich village, but later a standard gauge line was put in to allow access to the Ambergate & Pye Bridge branch of the MR, and also to the newer 'Pentrich Colliery' at Hammersmith (now the site of Geeson's scrap yard). (Patrick Morriss)

Demolition work starts
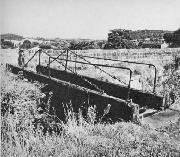
A close-up view of the swing bridge, taken in the mid 1960's

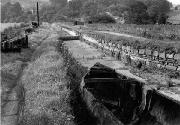
This shot shows the second aqueduct over the railway
This shot shows Bridle Lane bridge, Hartshay, from the east.
A view from the towpath - the railway bridge is the girder in the middle distance
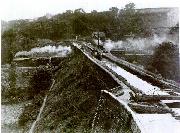
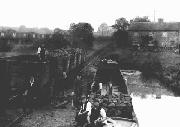
This shot is a classic - rail and canal both in operation
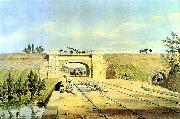
This early print shows the aqueduct in its entirety
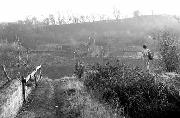
Our Chairman, Patrick Morriss, says of this picture: "The picture is taken just East of the current A610 embankment looking east towards the Butterley Tunnel. The chimney was in the yard of the Butterley company and was demolished in c1959 The pit tips are Haslam's (Pentrich) which shut in 1944 and were reclaimed about 25 years ago They had an overhead cableway with buckets to drop spoil on the heaps and the pit head was where Geesons scrapyard is now. The large Sycamore tree is still there except even bigger!"


)
. (Patrick Morriss))


 which shut in 1944 and were reclaimed about 25 years ago They had an overhead cableway with buckets to drop spoil on the heaps and the pit head was where Geesons scrapyard is now. The large Sycamore tree is still there except even bigger!")