Simon Stoker Archive - Canal Views
This photo gallery forms a part of the Simon Stoker Archive, a collection of images shared by the former General Manager of the Cromford Canal, Simon Stoker. The captions are his own.
Images marked (ADS) were taken by his late father, Dr. Desmond Stoker.
More images can be seen on the next page.
Please note that the galleries are due to be updated in the near future to use a better viewing system.
Click on any of the images to see a larger version.
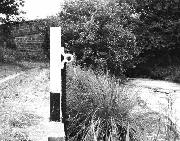
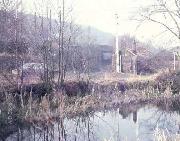
This picture was taken in late 60's. It is a photo of Bridge 1 with the ground paddle in situ. (This was later removed because it was a hazard to boat towlines)
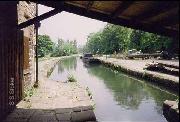
Looking through the newly built canopy at the top of Cromford Wharf. This was rebuilt to original photos by CCS and a job creation scheme. Our work boat is midground left and behind it are the "Duchess" and the floating dredger. On the right is the dismantled cast iron swingbridge rescued from Bull Bridge Aqueduct.

The first and last trip with John Gray through the Gregory Tunnel. (see Building Bridge 6)
John Gray on the one and only trip through the Tunnel, crossing the Iron Aqueduct. Taken on December 21st 1988.
Cromford Wharf as found in late 60s. The small warehouse is behind the trees to the left. Note the brand new work punt that was suddenly unloaded by BWB (called the 'Lea Wood') by way of claiming possession of the canal. It disappeared just as suddenly!
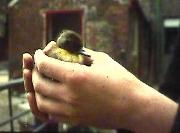
A misplaced duckling chick rescued by a kindly CCS worker.
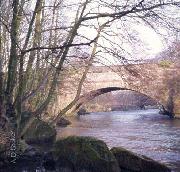
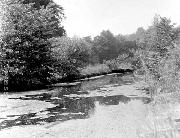
Leawood Aqueduct. An 80 yard span, which carries the canal at approximately 260ft above sea level, and 30ft above the River Derwent. (ADS)
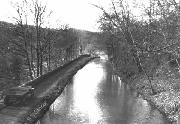
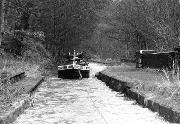
East of the Iron Aqueduct - This restored section has been breached several times since original construction. Notice the piles driven in down the left hand side of the canal. This picture was taken with the water almost at the point of overtopping.
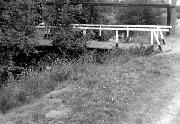
The Swing Bridge (Bridge 2) at High Peak in the late 1960s.
![February 1979 - this was taken at sunrise on a hard winter. Note absence of canopy and also that the water was only frozen to the end of the wharf. Where the main feed entered it never froze as the supply was mainly out of the ground via soughs.
[We later discovered the original culvert which fed water directly to the main wharf, just past the canopy on right. This was reinstated by way of 2 X 4" pipes which supplied warmer water to main line and thus prevented freezing.]](../../images/ss_archive/thumb/ssimg000005.jpg)
February 1979 - this was taken at sunrise on a hard winter. Note absence of canopy and also that the water was only frozen to the end of the wharf. Where the main feed entered it never froze as the supply was mainly out of the ground via soughs.
[We later discovered the original culvert which fed water directly to the main wharf, just past the canopy on right. This was reinstated by way of 2 X 4" pipes which supplied warmer water to main line and thus prevented freezing.]
High Peak Junction, immediately east of Bridge 2, before the trail had been properly developed. (ADS)
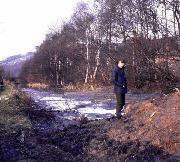
This was the mess left when STWA cut through the canal to lay their pipeline to the Ogston Reservoir. The new pumping station was built just above and to the right of the offside bank. Pressure from us and others eventually managed to get them to clear the spoil - with a dragline which also nearly ruined the canal! (ADS).
)

)

 by way of claiming possession of the canal. It disappeared just as suddenly!)

)

 at High Peak in the late 1960s.)
![February 1979 - this was taken at sunrise on a hard winter. Note absence of canopy and also that the water was only frozen to the end of the wharf. Where the main feed entered it never froze as the supply was mainly out of the ground via soughs.
[We later discovered the original culvert which fed water directly to the main wharf, just past the canopy on right. This was reinstated by way of 2 X 4" pipes which supplied warmer water to main line and thus prevented freezing.]](../../popwindow.htm?image=images/ss_archive/large/ssimg000005.jpg?narrative=February 1979 - this was taken at sunrise on a hard winter. Note absence of canopy and also that the water was only frozen to the end of the wharf. Where the main feed entered it never froze as the supply was mainly out of the ground via soughs.
[We later discovered the original culvert which fed water directly to the main wharf, just past the canopy on right. This was reinstated by way of 2 X 4" pipes which supplied warmer water to main line and thus prevented freezing.])
)
)