Photo Archive - Ironville to Langley Mill
This photo gallery shows a number of the images within the FCC archives picturing the canal between Ironville and Langley Mill. Please note that the galleries are due to be updated in the near future to use a better viewing system.
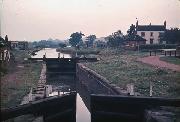
The Butterley Company lock
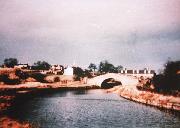
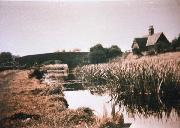
A coloured view of the bridge
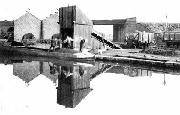
Ian Moss shows us what Langley Mill looked like when the Cromford Canal went somewhere and before much of the industrial development took place around the basin and line of the canal
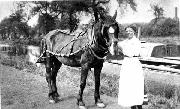
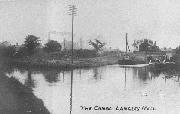
A fine lady with a fine horse, at Langley Mill - but where exactly? We think the chimney (far right) is part of Beggarlee colliery, and there is a small hut on the offside, far left

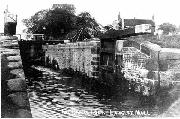
An old (and rare) image of Stoneyford Lock
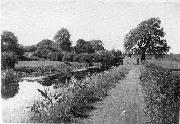
Stoney Lane Bridge (42) has been gone for a good while
Possibly a unique photograph of loading at Beggarlee Wharf, approximately where the Langley Mill Boatyard now exists. Coal was tipped from the railway wagons onto the conveyor which lifted it and dropped it into boats. It was this traffic that kept the last half mile of canal open till 1965. The rest was closed by the LMS Act of 1944
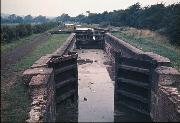
The canal lock at Langley Mill
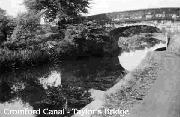
Bridge 40, Slaley's Bridge was also known as Taylor's Bridge
Ian Moss took this picture of Strutt's Lock in the 1960's. This is now buried under the A610 Langey Mill bypass. You can just see the roof of the cottage on the picture above on the skyline
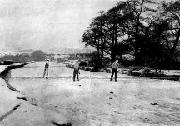
Taking advantage of winters as they used to be at Langley Mill, just above the lock. In the background are the former Beggarlee Wharf where the last coal traffic was loaded and the Great Northern Railway bridge, now the A610 embankment. The dress suggests 1960s. Could this be the big freeze of 1962/3? (Courtesy Brian Key)
A rare photograph of working boats, and, yes, it is just the Cromford still although it is below Lock 14. The Erewash finished in the basin to the left, so the wide boat, probably an Upper Trent Boat, passing the tied up pair of narrowboats, is just leaving our canal


 is part of Beggarlee colliery, and there is a small hut on the offside, far left)
 image of Stoneyford Lock)
 has been gone for a good while)


)
